
Introduction
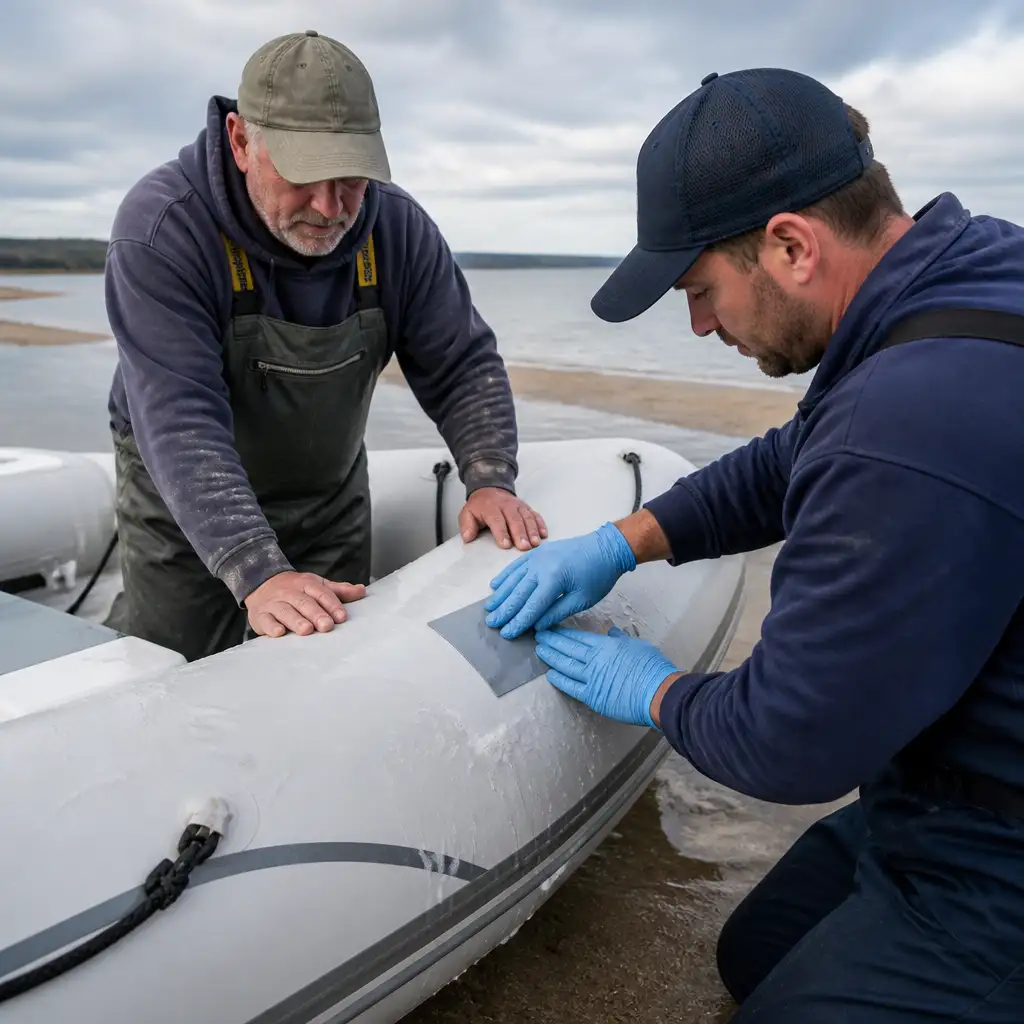
Slow air loss in an inflatable boat is one of those problems that quietly undermines safety, performance, and enjoyment on the water. For saltwater fishermen operating in Buzzards Bay and other Cape Cod waters, a slow leak can mean reduced hull rigidity, degraded handling when fighting fish, and frustration during long days offshore.
This guide walks through practical, step-by-step diagnostic methods aimed specifically at inflatable boats and RIBs: how to check valves, seams, and punctures; how saltwater accelerates certain failure modes; temporary field fixes to keep you safe on the water; and objective criteria for deciding between professional repair and full retubing.
Expect actionable inspection steps you can perform yourself, clear guidance on when to call a specialist, and links to East Coast Inflatables resources for professional leak detection and tube replacement when warranted.
Why slow air leaks matter for saltwater fishermen in Buzzards Bay
A slow leak may not strand you immediately, but it changes how your inflatable performs. Reduced pressure softens the tube, lowers freeboard, and changes the boat’s chine entry and planing characteristics. For anglers, that can mean a less stable casting platform, more spray on a rough day, and degraded fuel efficiency on longer runs across Buzzards Bay.
Saltwater environments create specific risks: salt accelerates corrosion on metal fittings and valves, sand and rocks in shallow fishing spots abrade tube surfaces, and UV exposure on long summer days accelerates material breakdown. Recognizing these local drivers helps target diagnostics and avoid repeat leaks.
If you want a professional inspection or you’re unsure where to start, East Coast Inflatables offers specialized leak detection services for inflatable boats and RIBs that focus on valves, seams, and hidden punctures.
How to prepare for leak diagnostics: tools and safety
Before you begin, collect a few basic items: a reliable pressure gauge, a hand pump or compressor with a regulator, a spray bottle for soap solution, a soft brush or sponge, nitrile gloves, and a flashlight or inspection lamp. If you have a mobility ramp or cradle at the launch, bring a towel or clean pad to protect the tube while you work.
Safety first: perform inspections on a stable surface, avoid working alone if you’re on a remote shoreline, and don’t overinflate tubes to try to “make the leak show up” — excessive pressure can worsen seam damage. Check your boat manufacturer’s recommended pressure and remain within those limits.
Document starting pressures and chamber-by-chamber readings. Inflatable boats with multiple chambers require individual checks; a slow leak in one chamber can mask as a general pressure drop if you only monitor total inflation.
Step-by-step diagnostics for valves, punctures, and seams
Follow this ordered approach to isolate slow leaks. Start with the easiest, most common sources and work toward harder-to-find issues.
- Record baseline pressures. Inflate each chamber to the recommended pressure and note readings with a calibrated gauge. Reconfirm after 15–30 minutes to determine which chamber is losing air.
- Inspect valves first. Most slow leaks come from valve stems, loose cores, or damaged valve caps. Remove the valve cap and gently press the valve pin to listen for hiss. Tighten removable cores with an appropriate tool if loose, and replace damaged caps. For persistent valve issues, professional valve repair or replacement is often necessary; see East Coast Inflatables’ valve repairs and leak detection.
- Soap-test the tube. Mix a mild soap solution (a few drops of dish soap in a spray bottle of water). Working in small sections, spray the surface and watch for small bubbles indicating leakage. Use gentle pressure if you suspect a seam or a microscopic puncture.
- Check seams and seams’ ends. Seams are vulnerable where material laps end or where previous repairs exist. Inspect visually for separation, discoloration, or flaking adhesive. Run the soap test along the seam line and ends; seams that bubble slowly often indicate adhesive failure or stitching deterioration in older tubes.
- Inspect for embedded punctures. Look for tiny puncture holes from hooks, crabs’ claws, or flotsam. Use backlighting (flashlight behind the tube) to reveal hairline punctures. The soap test is particularly effective here; even small bubble trails are diagnostic.
- Check fittings and accessories. Inspect rubbing strakes, rubbing patches, handles, mooring points, and valve bases. Corroded or movement-worn fittings can stress nearby material and create slow leaks.
When diagnostics point to a seam or material deterioration rather than an isolated puncture, consider that repairs may be temporary if the underlying tube material is aged or UV-damaged.
Saltwater-specific causes: corrosion, abrasion, and UV effects
Saltwater accelerates several failure modes that cause slow leaks:
- Valve and hardware corrosion. Salt spray and salt crystals collect around valve bases and stainless fittings. If a valve seat corrodes or threads pit, a previously airtight seal can begin to leak slowly. Regular rinsing after use and proactive valve inspections reduce this risk.
- Abrasion from sand and shell. Launching from sandy beaches or shallow oyster flats common around Buzzards Bay can abrade tube coatings. Repeated abrasion eventually thins material and exposes backing fabric, producing slow leaks that may start as hairline punctures or seam edge wear.
- UV and oxidization. Long exposures on sunny South Coast days degrade surface treatments on PVC and Hypalon differently: PVC can become brittle and crack; Hypalon fades and may lose coating adhesion. Both conditions increase the likelihood of seam failures and patch delamination.
Examples local to the area include anchor snags on rocky outcrops near Wareham, oyster bed abrasion in tidal flats off Marion, and salt-spray corrosion from frequent nearshore runs out of New Bedford. Documenting where and when you use your boat helps correlate leak patterns with local conditions.
Temporary field fixes for slow leaks and best practices
When you’re on Buzzards Bay and need a short-term solution to get home or to a repair facility, several temporary fixes can be effective. Remember that field repairs are temporary and intended to last only long enough to reach professional service.
- Inflatable patch kits. Carry a manufacturer-compatible patch kit for PVC or Hypalon. Clean the area with fresh water and a clean cloth, roughen lightly if the kit instructions call for it, and apply the patch per instructions. Allow recommended cure time before re-pressurizing fully.
- Adhesive tapes and plugs. PVC repair tape or quick plug kits can temporarily seal small punctures. Use these only as interim solutions and avoid reusing tape over previously covered failures—residual adhesive and surface contamination reduce long-term effectiveness.
- Valve clamping or core tightening. If the valve core is the source, tightening or replacing the removable core (if you carry a spare) can restore airtightness. Avoid overtightening; use proper tools and follow manufacturer torque guidance.
- Slow inflation management. Keep affected chamber pressures slightly higher (within safe limits) during transit to maintain boat handling. Check pressures frequently and be prepared to top off with your portable pump.
Field fixes should be followed by a professional inspection. If you rely on temporary measures, plan to bring the boat to a repair specialist as soon as practical to ensure a durable, material-appropriate repair.
When to repair professionally versus retubing: decision criteria
Deciding whether to repair an inflatable boat or proceed with tube replacement (retubing) depends on condition, age, damage extent, and long-term value. Use these criteria to guide your decision.
- Single, isolated puncture or small seam failure. If the boat is otherwise in good condition and the damage is localized, a professional patch or seam repair is often the economical choice. Qualified shops can restore air retention and extend tube life.
- Multiple or recurring leaks. Repeated repairs in multiple locations, recurring seam edge failures, or extensive prior patching suggest the tube material may be near the end of its service life. In many such cases, tube replacement provides better long-term value.
- Material deterioration and UV damage. If inspection reveals brittleness, flaking coatings, or widespread fabric exposure—common in older PVC tubes—retubing is often safer and more cost-effective than piecemeal repairs.
- Structural component failure. Damage to integral features such as rubbing strakes, keel reinforcements, or multiple seam separations that compromise chamber integrity may require retubing or more extensive work than patching can reliably address.
- Boat value and intended use. Consider the hull condition and your plans for the boat. If the hull is solid and you intend to keep the boat long-term, retubing can restore performance and resale value. For older hulls with limited remaining service life, repeated repairs may be uneconomical.
East Coast Inflatables can assess your boat and recommend appropriate next steps. Our team handles material-specific repairs for Hypalon and PVC and provides honest guidance on when tube replacement is the better option. For general repair questions and maintenance planning, see our inflatable boat maintenance resources.
Frequently Asked Questions
Q: How quickly should I act if I find a slow leak before a day of fishing in Buzzards Bay?
A: Address it as soon as possible. If it’s a valve issue you can tighten or core-replace, you may be safe to fish after monitoring. For seam or material failure, apply a temporary patch and plan to return to shore early for a professional inspection.
Q: Are DIY patch kits reliable for Hypalon as well as PVC?
A: There are material-specific kits for Hypalon and PVC; using the correct kit and following preparation instructions is critical. DIY patches can be effective short-term, but for durable results, have a qualified shop perform material-appropriate repairs or seam work.
Q: How do I know when valve problems require professional valve repair rather than a simple core replacement?
A: If a removable core replacement or tightening stops the leak, the fix is likely simple. If air continues to escape around the valve base, the valve seat or surrounding tube material may be damaged or corroded; in that case arrange professional valve repair and leak detection to prevent repeat failures.
Slow air loss isn’t always easy to diagnose. East Coast Inflatables specializes in locating leaks and identifying valve, seam, and tube issues. Contact us to schedule a professional inspection.